Creating a wedding binder to use on the your big day is the best way to eliminate stress and make sure everyone is on the same page. By putting all the details on paper, you can hand off the binder to your day-of coordinator (or anyone who is “in charge,” like a family member) and ensure everything runs smoothly.
You can purchase templates on Etsy or create your own on free websites like Canva. Purchase the template shown above from MyDigitalDarling on Etsy!
What to Include
Your binder will most likely be handed off to someone else on the day of your wedding, so make sure to include every detail, so your coordinator can execute your vision flawlessly.
Here’s a basic list to get you started:
- Table of Contents: this allows someone to know exactly where everything is located within the binder
- Venue Locations: Address of ceremony, reception, and rehearsal locations
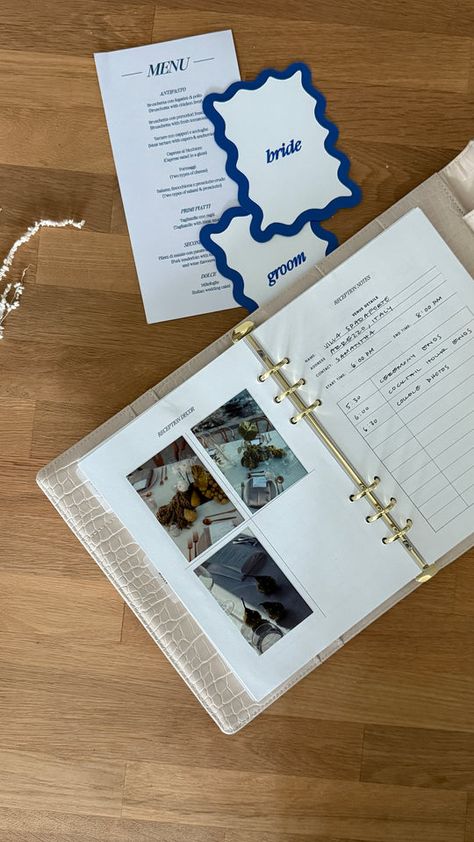
- Vendor Contacts: List the name, role, and contact information for every vendor
- Wedding Party: the names and contact information for everyone in your wedding party
- Task Delegation: specific tasks for anyone on the day of the wedding
- (Ex. who is picking up breakfast for the wedding party)
- Schedules:
- Bride & Bridesmaids- when they should arrive, what time each person is getting their hair/make up done, what time to be ready by
- BONUS TIP- tape this up in the bridal suite to keep everyone on time!
- Groom & Groomsmen- when they should arrive, when pictures begin
- Detailed Timeline for the entire day
- Vendor Timeline- when each vendor is arriving and departing
- Ceremony Timeline- when each person is walking down the aisle, what songs will be played, etc.
- Reception Timeline- the couple’s entrance, when dinner is served, when the dance floor opens, etc.
- Rehearsal Timeline
- Bride & Bridesmaids- when they should arrive, what time each person is getting their hair/make up done, what time to be ready by
- Family Photo List: This is a huge help to your photographer to have a detailed list of the posed family photos you want. Create this by listing each person’s name (not mom, dad, aunt), starting with the largest group photo and working down to the smallest
- Music for Ceremony & Reception
- Reception Menu: including any food allergies and dietary restrictions of guests
- Checklists: creating these lists will allow you to think through everything you’ll need ahead of time
- Bridal Suite
- Groom’s Suite
- Emergency Kit
- Decor:
- List of everything rented
- List of everything purchased
- Photos/examples of how elements should be set up
- Floor Plans:
- Ceremony- how many chairs in each row, how many rows, which rows are reserved
- Reception- tables numbered correctly and where they should be located
- Seating Chart: include a copy of the seating chart
- BONUS TIP- include all guests’ entree option, if applicable, in case there are any questions
- Copy of Speeches
- Copy of Ceremony Script
The Binder Itself
Use a binder of a bright color that can be found easily throughout the hectic day.
Use tabs within the binder allowing you to easily flip to a specific section.
Add a zip pocket to the binder to put envelopes with your vendor tips. This way, your coordinator has them in a designated place to hand out.
Print multiple copies, so everyone is on the same page.
If you are planning a wedding in Roanoke, Richmond, Fredericksburg/Northern Virginia, The Shenandoah Valley, Coastal Virginia, or Charlottesville/ Lynchburg, Virginia, we can help with your wedding planning and ideas.